Friday, January 22, 2016

中古編み機の選び方 - Choosing a second-hand knitting machine

ずっと前から編み機がほしいなぁーと思っていましたが、新しい年になって勇気をだして買うと決めました。いろいろ調べているうちにこんなことがわかりました・・・

  • 今時、編み機は全く人気がない。全盛期は70、80年代だったらしい。
  • ほとんどのメーカーはもう作っていない。販売も修理サービスはもう終わっている。(唯一残っているメーカーはDLLES IN(旧シルバー精工)。
  • ヤフオクに出ている編み機のほとんどは使い物にならないジャンク品。
シルバーのパンチカード式編み機はあまりオークションに出品されないのは事実です。そのため、格安のブラザー製にしようと思いました。そこで、使えそうな編み機とそうでないものをどう見分ければよいのでしょうか?

中古のブラザー編み機(4.5ピッチ)の購入を検討している皆さんのために簡単なガイドをまとめてみました。
(私はエキスパートではないのであくまでも参考程度に留めておいてください。)


I've always wanted a knitting machine and the new year seemed a good time to take the plunge and buy one.  My research led me to the following conclusions:
  • No-one buys knitting machines any more. Their popularity peaked in the '70s and '80s.
  • Most manufacturers don't make them any more. Sales and repairs are no longer available. There is only one manufacturer left in Japan, DLLES IN (which acquired the now-defunct Silver Reed brand.)
  • Most of the knitting machines on Yahoo Auctions are expensive paperweights.
 Very few Silver Reed machines are auctioned online and that's the main reason why I decided to go for a cheaper Brother machine. So how do we separate the working machines from the junk?

I have compiled the following simple guide to buying a used Brother knitting machine (4.5 pitch) in Japan. Please be aware that I am not an expert and this information is for reference only.

候補を以下の三種類に絞りました。
I focused on the following three models:

Model/型番 Details/詳細
KH-871
パリエ 7
Palie 7
1980- パンチカード式、ニットリーダー内蔵(1/2縮尺シート)
1980- Punch card, built-in knit leader (half size)
KH-881
パリエ8
Palie 8
1986-87 パンチカード式、ニットリーダー内蔵(1/2縮尺シート)
1986-87 Punch card, built-in knit leader (half size)
KH-891
パリエA
Palie A

1987-89 パンチカード式、ニットリーダー内蔵(1/2縮尺シート)
1987-89 Punch card, built-in knit leader (half size)

スペックはほとんど一緒です。パンチカードのセットだけが違うらしいです。
All three have pretty much the same specs but the punch cards are slightly different.

中古編み機の主なトラブルは:
  • 針押さえスポンジの劣化 (隙間テープで代用できるらしい)
  • 針のさび
  • グリスの固まり
The main issues with second-hand knitting machines are:
  • Sponge bar deterioration (some people use draught excluder tape as a substitute)
  • Rust on the needles
  • Hardening of grease in the machine
もちろん見た目だけでは状態がわかりません。出品者にはリサイクル業者が多く、説明文に「専門知識がないのでわかりません」と書いていることが多いです。できれば元々編み機を購入した個人から買った方が安心だと思います。

It's impossible to tell the condition of a machine just by looking at it. Most sellers are second-hand shops and they usually say that they have no specialised knowledge about knitting machines and therefore they can't answer specific questions. It's a better bet to buy from the original owner, if possible.

ちなみにオークションで落札できたのはパリエA KH-891でした。とても状態が良くてすぐ使えました。これは私の初めての機械編みの作品!!!

I ended up buying a Palie A KH-891. It is in great condition and I was able to knit with it straight away. Here is my first ever machine knitted masterpiece!!!


次回は編み機の付属品を見てみます。

Next time, we'll have a look at knitting machine accessories.

Monday, October 13, 2014

魚焼きグリルをピカピカにする方法

この季節、焼き魚がおいしいですよね。

しかし、グリル焼き網を掃除するのは面倒で、焦げ付いたところがなかなか落ちなくて困ります。


そこで、グリル焼き網を簡単にピカピカにする方法をご紹介します!

用意するのはこれ:
重曹とアルミホイル。

くしゃくしゃと丸めたアルミホイルを水で濡らし、乾いた重曹を付けます。


適当にゴシゴシすると・・・


 こんなに綺麗になります!


グリル網の種類(フッ素コートのものなど)によってこの裏ワザを使えない場合がありますので説明書をご確認の上、お試しください。

Friday, September 19, 2014

お姫様ケーキを作ってみよう!

 メリダ姫に決定!

娘の4歳の誕生日にお姫様フォンダントケーキに挑戦しようと思いました。しかし、作ったことがない、失敗する可能性が大。
まぁいいや、やってみよう!

今回はケーキの真ん中に穴をあけてお人形さんを差し込むお姫様ケーキを作ってみました。ケーキはスカートの部分になり、その上にフォンダントを被せます。娘は「メリダとおそろしの森」に出てくるメリダ姫が大好きなので急遽、ヤフオクでお人形さんを入手しました。


ケーキ作り

次はケーキです。ブルーベリーケーキの生地を専用の型に流し込み、オーブンで1時間ほど焼きました。


オーブンから取り出して冷まして、さぁー型から外そうと思ったら・・・く、くずれた!ショック!! やっぱりブルーベリーを入れたのは失敗だった。


どうしよう?誕生日は明日。時間がない。

仕方がなく、緊急対策用のバニラケーキを追加で焼きました。シフォンケーキの型で焼いたので穴をあけなくてもOK。最初からこっちにすればよかったと反省しました。


よーし、ケーキが焼けたので次はデコレーションだ!

フォンダントで困惑

ケーキの塔を作り、間においしいバタークリームを塗りました。❤


バタークリームを全体に塗り、しばらく冷蔵庫で冷やしました。


お湯で温めたナイフを使って表面をスムーズに。


次はフォンダント。フォンダントとは粉砂糖でできた食べられる粘土のようなものです。そんなにおいしいわけではないが、仕上がりはとてもきれいです。レシピはここです。普通のスーパーではなかなか売っていないショートニングとコーンシロップはカ○ディコーヒーで買いました。材料を全部ミキサーに放り込んで混ぜるだけです。色つけには天然由来の粉末食用色素を使いました。粉をバニラオイルに溶かし、少しずつフォンダントに加えながらこねました。時間がなかったので薄い水色でストップしました。


いよいよメリダ姫の出番です!下半身が汚れないようラップで包みました。


最初にドレスの上の部分を作りました。ネックラインの部分に切り込みを入れて、あとは適当に貼り付けたら完成!ケーキに差し込んだらこんな感じになりました。

残るのは最も難しいところ、スカートです。フォンダント用のマットに片栗粉で打ち粉をして、麺棒で伸ばしてみました。5ミリぐらいの厚さに伸ばし、めくってみるとやっぱりくっついている。2,3回やり直しても同じ結果。

時間がなかった。娘は後30分で幼稚園から帰ってくる予定だったし、赤ちゃんはぐずり始めたし・・・急がないと!

ラストスパートで大量の片栗粉を振っておいて、フォンダントを伸ばしてすぐケーキに移しました。


余分なフォンダントを切り取って、ネックラインにアザランを付けて少し形を整えたら出来上がり!


幼稚園から帰ってきた娘は大喜びでした。あぁ、良かった、良かった。来年は何作ろうかな?

Wednesday, September 10, 2014

Merida Birthday Cake


Well hello, dolly!

I decided to make a birthday cake for my daughter's fourth birthday.  Not just any cake, but a doll cake covered in super sweet fondant. Two problems immediately came to mind: my daughter doesn't have any dolls and I have never made fondant before.  Despite the very real possibility that my little girl would end up with a barbie doll swimming in sugary goo for her birthday, I decided to give it a go.

First, the doll.  Little Miss loves Frozen so I suggested she might like a Queen Elsa cake.  She quickly nixed that idea and opted for Merida, the spunky red-headed heroine of Brave.  Good choice!  Elsa isn't the best role model anyway...

Here is Merida before her cakey makeover:


A piece of cake?

Next, the cake. The recipe for blueberry cake came from the amusingly titled Kiss My Bundt by Chrysta Wilson.  I used a Wilton Wonder Mold to create the shape of the dress.  Here it is, ready to go in the oven.


One hour at 180 degrees later, my talking Japanese oven told me that the cake was ready and politely informed me that I had better take it out quick smart, or else.
Then this happened.


Epic. Cake. Fail.

Apparently the Wonder Mold doesn't work well when you have lots of blueberries in the batter that sink to the bottom and make everything soggy.  Good to know.

As it was already birthday eve, panic started to set in.  I quickly whipped up a late-night supplementary cake using a chiffon cake pan (tube pan.) Note to self: skip the Wonder Mold (wonder why I bought it!) and go straight to the chiffon cake pan next time.  The Wonder Mold has now been repurposed as a bird bath.

My pinch hitter cake is below.


Frosting and fondant frustration

Now for the decoration.  First, I created a lovely cakey tower and trimmed the edges with a bread knife.  I spread buttercream (also from Kiss My Bundt) between the layers.


Next, the whole thing got smothered in buttercream and then went in the fridge to chill for a bit.


A knife and some hot water made everything nice and smooth.


Next up, the fondant.  I made a huge batch of fondant in my mixer (which complained the whole time.) Colouring the fondant was a bit of a challenge as I used powdered food colouring made from spirulina.  I noticed that my vanilla oil was mostly glycerin and a bit of alcohol so I dissolved the powder in the vanilla oil and slowly kneaded it into the fondant.  I was running out of time so I settled for a nice sky blue.  Merida didn't seem to mind.


I then prepared Merida for her big transition with some plastic wrap.


She then got a makeshift fondant bodice.  I cut out the neckline and then squished the rest on to her torso, snipping under the arms with scissors.  And here she is in the cake.

Finally, it was time for the skirt. This was the most difficult part of the process.  I dusted the fondant mat with cornflour, rolled out the fondant, then let forth a stream of Gaelic curses as the fondant got completely stuck to the mat.  I did the same thing twice more and began to feel that the words "Fondant Fun!" on my rolling mat were taunting me.

I was also running out of time.  The kindergarten bus carrying Little Miss was due in less than half an hour and baby was starting to get grumpy.  Did I mention that I was carrying my baby on my back?  Yeah, I like to bake and babycarry.

In a last-ditch attempt, I covered the mat in a super thick layer of cornflour, rolled out the fondant and then transferred it to the cake.


A bit of smoothing, a bit of trimming, some decoration around the neckline and Merida was complete!  Here she is:


Little Miss looooved the cake by the way. She wasn't too keen on the fondant but the buttercream got the thumbs up.  Not sure how I'm going to top this one next year.

Monday, February 3, 2014

グリーンダカラちゃん風ニット帽 - Green Dakara-chan Knitted Hat

皆様お馴染みのグリーンダカラちゃん。冬バージョンのCMではとってもかわいいニット帽をかぶっていますよね。3歳の娘のために編んであげたいと思い、テキトーに作ってみたらそれらしいものができました!
A soft drink commercial here in Japan features a little girl called Green Dakara-chan wearing a very cute knitted hat.  I decided to make one for my daughter and ended up producing something that looks quite similar!

編み図も作ってみました。
I also made a pattern for the hat. (Made at http://knittingpattern.p-jansson.com/)
Dakara-chan Hat Pattern - ダカラちゃん風ニット帽 編み図(PDF)
サイズの目安:3歳(50㎝)
Approx. size: 3 year old (50 cm)

材料/Materials

極太毛糸2玉 (約150m)写真はミニスポーツの685番。
Two balls of bulky yarn (approx. 150 m).  I used Anny Blatt Mini Sport #685.

輪針 (6.5㎜、長さ60㎝)
Circular needle (6.5mm, 60cm long)

かぎ針 (6.0 mm)
Crochet hook (6.0 mm)


作り方/Instructions

66目をつくり、最初に作った1目とつなげて輪を作ります。編み図に沿って編みます。
Cast on 66 stitches and join to first stitch made, forming a loop.  Knit according to pattern.

縄編み/Cable

(右上3目交差)3目を縄編み針に移し、手前に持つ。次の3目を編む。
(C6F - cable 6 front) Slip 3 stitches on to cable needle and bring forward. Knit next three stitches.
縄編み針の3目を編む。
Knit three stitches from cable needle.
右上2目交差の場合、3目ずつではなく、2目ずつ編む。
For C4F, knit two stitches each instead of three.

最後の18目になったらとじ針で糸を通して、引っ張って結んでおく。
When you get to the last 18 stitches, use a yarn needle to pass the yarn through, pull and secure.

耳あて/Earflaps

かぎ針で編み図の耳あて取り付け部分(赤い線)に15目をつくる。編み針に移す。
Using a crochet hook, pick up 15 stitches for the earflaps as indicated on the pattern (red line.) Transfer to knitting needle.

メリヤス編みをしながら、各段の最初に1目減目し、最後の1目になったら結んでおく。反対側の耳あてもつくる。
Work in stocking stitch and decrease one stitch at the beginning of each row.  Tie off final stitch. Knit earflap on opposite side.
後もう少し!
Almost there!

とじ針で糸の始末をし、かぎ針を使って帽子・耳あてのまわりに細編みを一段編みます。
Weave in ends with a yarn needle and use a crochet hook to crochet a row of single crochet (SC) stitches around the hat brim and earflaps.

ひも/Ties

長さ50cmの毛糸を12本カットする。6本を片方の耳あての先端に通して4本ずつに分けて三つ編みをする。下の部分を結び、ハサミで房の長さを整える。反対側にもひもをつける。
Cut 12 50 cm lengths of yarn. Pass six strands through the bottom of one earflap.  Separate into 4 strands each and plait.  Tie at bottom and trim ends with scissors.  Make tie on other side.

そしてポンポンをつければ出来上がり!
Add a pom-pom and you're done!


追伸:久しぶりにRavelryに行ったら皆様が作ってくださったダカラちゃん帽子がいっぱいありました。どれもかわいくて嬉しいです!ありがとうございます!


Friday, August 2, 2013

McCall's 6108 - Infants' Bibs and Diaper Covers

Baby Shower Gift


My friend at work is expecting a baby at the end of the year and I decided to make something as a baby shower gift.  I was planning to knit or crochet something but then I realised - she is having her baby in Australia where it will be mid-summer.  Obviously a wooly had wouldn't be very useful.

A little Googling led me to this pattern: McCall's 6108.

I am not sure whether baby will be a boy or a girl so I decided on the frog on the bottom right.  Now for the fabric selection:

I used four different types of fabric for this project - white polka dot cotton, green cotton shirting, white double gauze and PUL (waterproof fabric). 

First up, the applique.  I am new to applique so I improvised a bit.  For the small circles, I found some similar sized objects to trace around (a 500 yen coin and the lid from my marker pen).  I also fused interfacing to the back of everything.

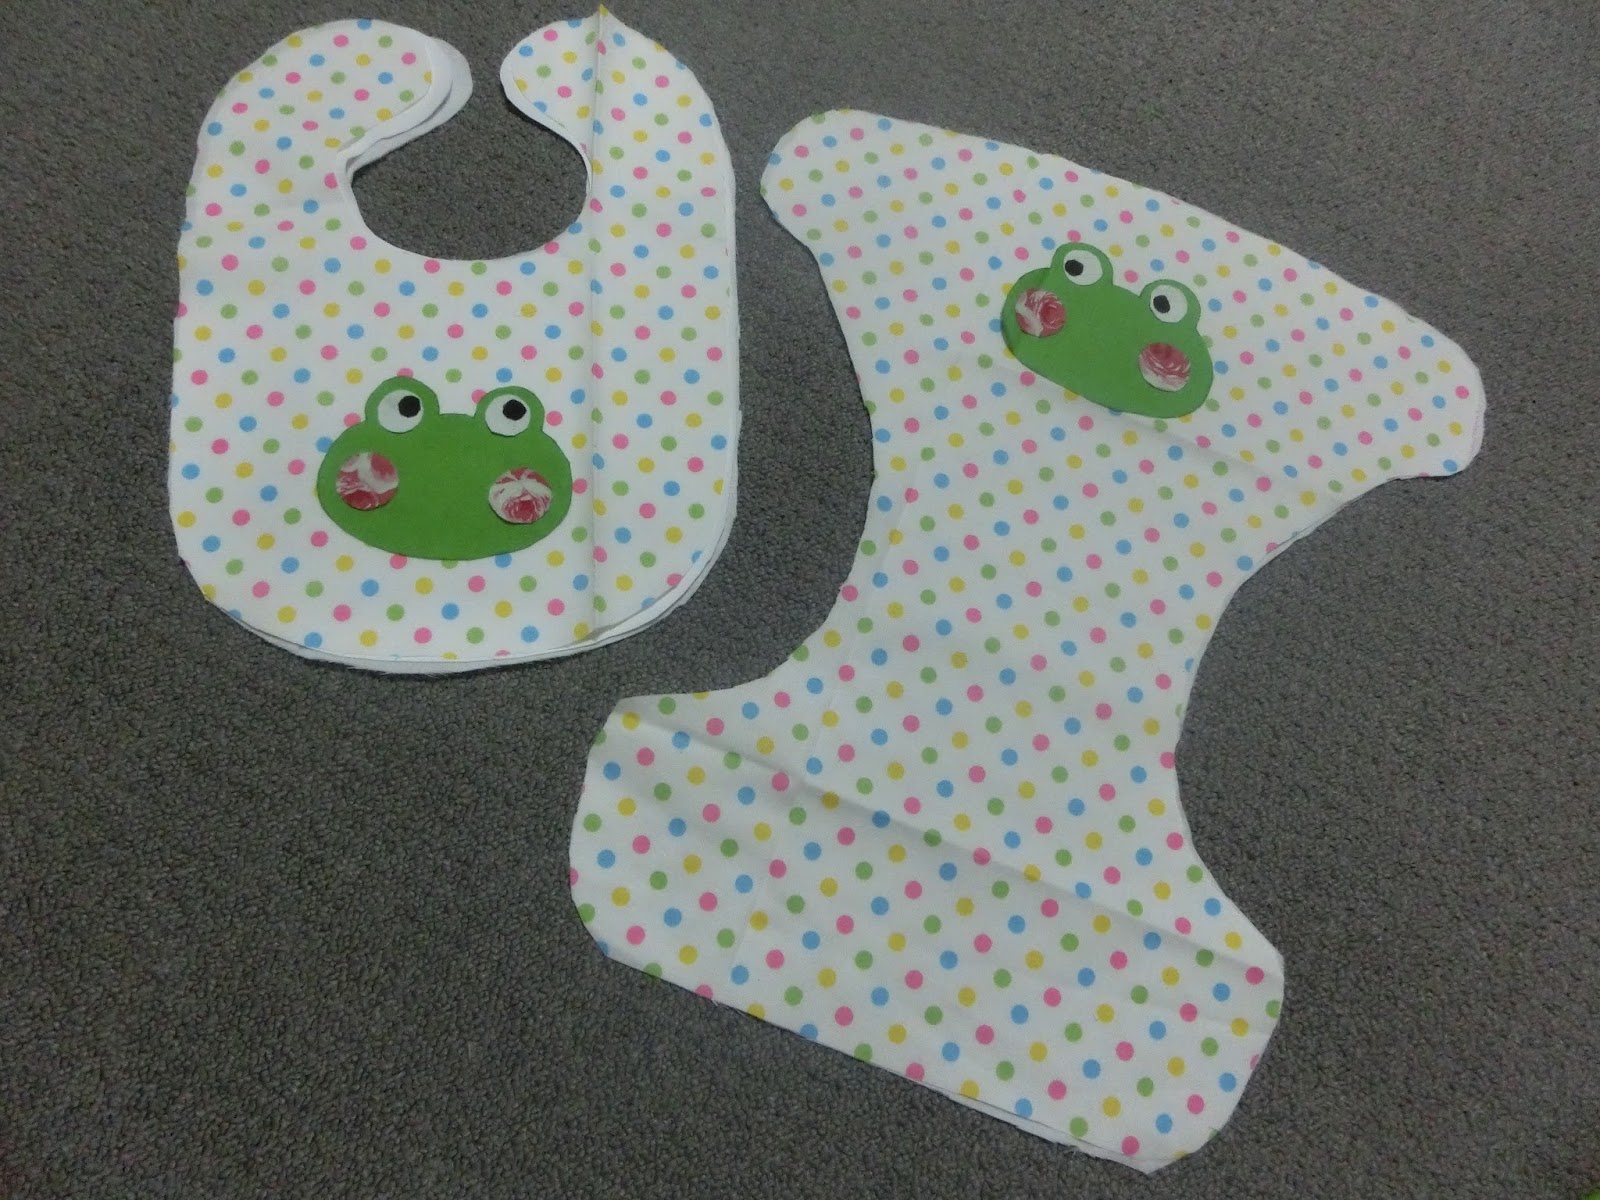
Everything is cut out and ready to go!

Next, the froggies' faces.  I fused everything together with some double-sided interfacing and attempted to do a zig-zag satin stitch around the edges.  I failed miserably.  After unpicking the tangled mess, I instead opted for a blanket applique stitch to attach everything.  Hope the froggies survive the wash!


The mouths are sewn with three strands of embroidery floss using a back stitch.

The pattern requires batting for the inside of the bib.  I didn't have any on hand (and I'm sure it would take ages to dry) so I used some waterproof PUL fabric instead.

I am a glutton for punishment so I made my own bias binding this time.  You need lots and lots of it - well over 3 metres for the set!  The pattern calls for 1/4 inch double fold binding but that sounds way too narrow.  I think it should be closer to 1/2 inch.

It was a bit of a hassle getting the binding on.  I really need more practice (or a binding attachment!).  As a finishing touch, I sewed on some velcro and here it is!

The front of the bib and the back of the diaper cover.

 and the reverse sides.
I'd definitely like to make this one again as a gift - once I get a bit better at attaching bias binding, that is!