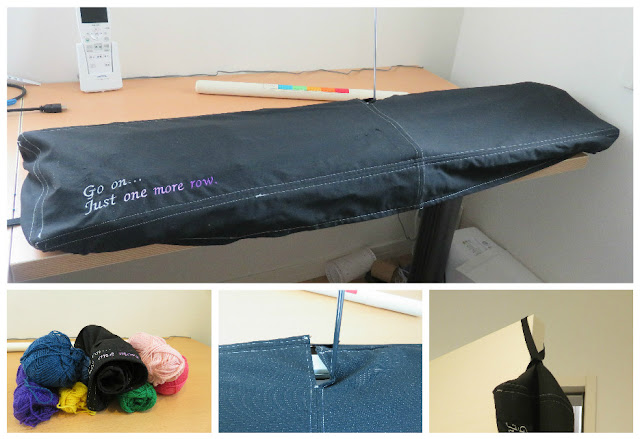
Welcome to Part 2 of my Trouser Transformation™ series!

With just one pair of trousers, you can make a fabulous Super Deluxe Knitting Machine Cover.
You will need:
1 pair of trousers
3 cm piece of velcro
Optional - 20 cm of elastic (for the loop)
Optional - 4 x 10 cm pieces of elastic (for the corners)
Step 1
Cut out the pieces as shown below. All pieces (except the velcro tab) have a 1.5 cm seam allowance. This cover is made to fit a standard Brother machine.
For this pattern I decided to use a sewing machine only, no overlocker. The seams I have used are known as clean seams (or turn and stitch seams). The seam allowance is turned under and sewn to hide the raw edge.
You can easily use an overlocker or other finishing technique to make this pattern. I didn't want the chance of anything catching on the needles. If you prefer not to do the extra finishing steps, please ignore them.
Here are the pieces. You can probably see that I have embroidered one. I messed it up big-time (embroidery machines are almost as temperamental as knitting machines!) I decided to soldier on, despite the unscheduled holes in my fabric.
Step 2
Pin the short sides of the top panels together. Mark 7 cm from one edge and then sew from the mark to the bottom edge of the fabric. This will be the opening for the tension mast.
And here we are! You can see that I have folded the seam allowances back, ready to be sewn down.
Once you have sewn down the seam allowances, do some reinforcing at the beginning of the seam where you made the mark.
Step 3
Next, sew the short sides of the two front panels. Finish the seams as desired.Attach the joined front panels to the front of the top panels (the opposite side to the opening.)
Finish the seams.
Make a 7mm double folded hem at one short end of both of the back panels.
Attach the back panels to the back of the top panels, matching the edges to the opening in the middle.
Step 5
Next, we sew the corners. This is pretty tricky but it should end up looking like this.As I am a perfectionist, I decided to use 5mm fusible webbing to turn back the seams and keep them in place before sewing.
And there is a finished corner! It's not all that pretty but if you use a matching thread, it shouldn't be too visible.
Step 6
Now we turn up a 1 cm double folded hem around the bottom edge. If you don't have a Hot Hemmer, run to your nearest craft store NOW and get one. It changed my life.
Step 8
Next, the velcro tab. I made a 5 mm double folded hem on all sides (because I am a glutton for punishment) but you can finish the edges any way you desire.
Finally, add velcro to the tab and the panel on the opposite side and you are done!
Optional extras
I added an elastic loop to one of the side panels so I can roll it up and store the cover when it is not in use.
I also added 10 cm of elastic to each of the corners (stretch while sewing!) to ensure a snug fit.
It turned out rather well but I probably should have repositioned the opening 1-2 cm to the right! Oh well, there's always next time.


No comments:
Post a Comment