Showing posts with label sewing pattern. Show all posts

Wednesday, December 28, 2016

Super Deluxe Knitting Machine Cover Tutorial


Welcome to Part 2 of my Trouser Transformation series!


With just one pair of trousers, you can make a fabulous Super Deluxe Knitting Machine Cover.

You will need:

1 pair of trousers
3 cm piece of velcro
Optional - 20 cm of elastic (for the loop)
Optional - 4 x 10 cm pieces of elastic (for the corners)


Step 1


Cut out the pieces as shown below. All pieces (except the velcro tab) have a 1.5 cm seam allowance. This cover is made to fit a standard Brother machine.
For this pattern I decided to use a sewing machine only, no overlocker. The seams I have used are known as clean seams (or turn and stitch seams). The seam allowance is turned under and sewn to hide the raw edge.

You can easily use an overlocker or other finishing technique to make this pattern. I didn't want the chance of anything catching on the needles. If you prefer not to do the extra finishing steps, please ignore them.

Here are the pieces. You can probably see that I have embroidered one. I messed it up big-time (embroidery machines are almost as temperamental as knitting machines!) I decided to soldier on, despite the unscheduled holes in my fabric.


Step 2


Pin the short sides of the top panels together. Mark 7 cm from one edge and then sew from the mark to the bottom edge of the fabric. This will be the opening for the tension mast.


And here we are! You can see that I have folded the seam allowances back, ready to be sewn down.


Once you have sewn down the seam allowances, do some reinforcing at the beginning of the seam where you made the mark.


Step 3

Next, sew the short sides of the two front panels. Finish the seams as desired.


Attach the joined front panels to the front of the top panels (the opposite side to the opening.)
Finish the seams.


Make a 7mm double folded hem at one short end of both of the back panels. 


Attach the back panels to the back of the top panels, matching the edges to the opening in the middle.


Step 5

Next, we sew the corners. This is pretty tricky but it should end up looking like this.


As I am a perfectionist, I decided to use 5mm fusible webbing to turn back the seams and keep them in place before sewing.


And there is a finished corner! It's not all that pretty but if you use a matching thread, it shouldn't be too visible.


Step 6


Now we turn up a 1 cm double folded hem around the bottom edge. If you don't have a Hot Hemmer, run to your nearest craft store NOW and get one. It changed my life.


Step 8


Next, the velcro tab. I made a 5 mm double folded hem on all sides (because I am a glutton for punishment) but you can finish the edges any way you desire.


Finally, add velcro to the tab and the panel on the opposite side and you are done!


Optional extras
I added an elastic loop to one of the side panels so I can roll it up and store the cover when it is not in use.
I also added 10 cm of elastic to each of the corners (stretch while sewing!) to ensure a snug fit.


It turned out rather well but I probably should have repositioned the opening 1-2 cm to the right! Oh well, there's always next time.


Saturday, December 10, 2016

Knitting Machine Dust Cover Tutorial - Part 1


I wanted to make a cover for my knitting machine and started thinking - where can I get long strips of fabric? Hmmm... Then the lightbulb went on.

Yes! I can use those old maternity jeans in my closet.

This is how you transform old jeans into a cool new cover for your knitting machine.

Materials

You will need:

Two pairs of stretch jeans (the bigger the better!)
One 180 cm zipper with two sliders that meet in the middle
Velcro (approx. 5 cm) - optional
Thicker contrasting thread for topstitching
Note: This pattern is designed to fit a standard gauge Brother machine (H10 x W106 x D23 cm)
The fit is baggy enough to include the handle and the clamp fittings on the bottom. If you prefer a tighter fit, adjust as necessary. As we are using reclaimed fabric, the fit may vary.


Cutting


Step 1
Unpick the inner and outer leg seams so the front and back of the jeans are separated. This takes a bit of time so be patient!


Step 2

Download the pattern pieces here. Print them out, cut out the pieces and stick them together with tape.

*A 1 cm seam allowance is included in all pieces.*

Pin the pieces to the fabric, following the grain wherever possible. The side pieces are the biggest so it's a good idea to use the back side of the jeans because it has more fabric ('cos that's where your bottom goes!).

Cut out the pieces and then overlock/serge everything. Denim frays easily so this is an important step. If you don't have an overlocker, you can use zig zag stitch or overcast stitch on your sewing machine. This is what you end up with (minus the optional velcro tab.)

Sewing

Step 3
First up, sew the side pieces together (the squared off sides, not the rounded ones.) Press the seam open and then do some decorative topstitching approx. 5 mm from each side of the seam with your contrasting thread. A 3.5 mm stitch length is just right.

If you wish to embroider a design on the side pieces, now is the time to do it. Don't forget about the 1 cm seam allowance.
 

Do the same to the bottom and zipper band pieces.


This is what the stitching looks like up close.


You now have five large pieces plus the optional velcro tab.

Step 4
We sew!

Pin one side piece to one zipper band piece, right sides together. Make sure there is enough fabric to go around the corners. The seam in the middle is the top where your machine's handle will be.

Start in the middle (where the centre seam is) and sew around and down to the bottom. Leave the last 2 cm of the seam unstitched. Don't worry if you forget, can always unpick it. Start in the middle again and sew down and around the other side.

The centre seam gets pretty thick so if your machine is having trouble feeding the fabric, just give a gentle pull toward the back between stitches to help it through.


Do the same with the other side piece and zipper band piece.

Go slowly when sewing around the corners, stopping to lift the foot and adjust the fabric every few stitches. Make sure that the edges of the fabric meet and that there is no extra fabric getting caught in the seam. The zipper band is longer than necessary so don't be afraid to give a little extra fabric in the corners.

Now is a good time to try it on for size. Pop one of the pieces on your machine to see how it fits. Adjust if necessary.


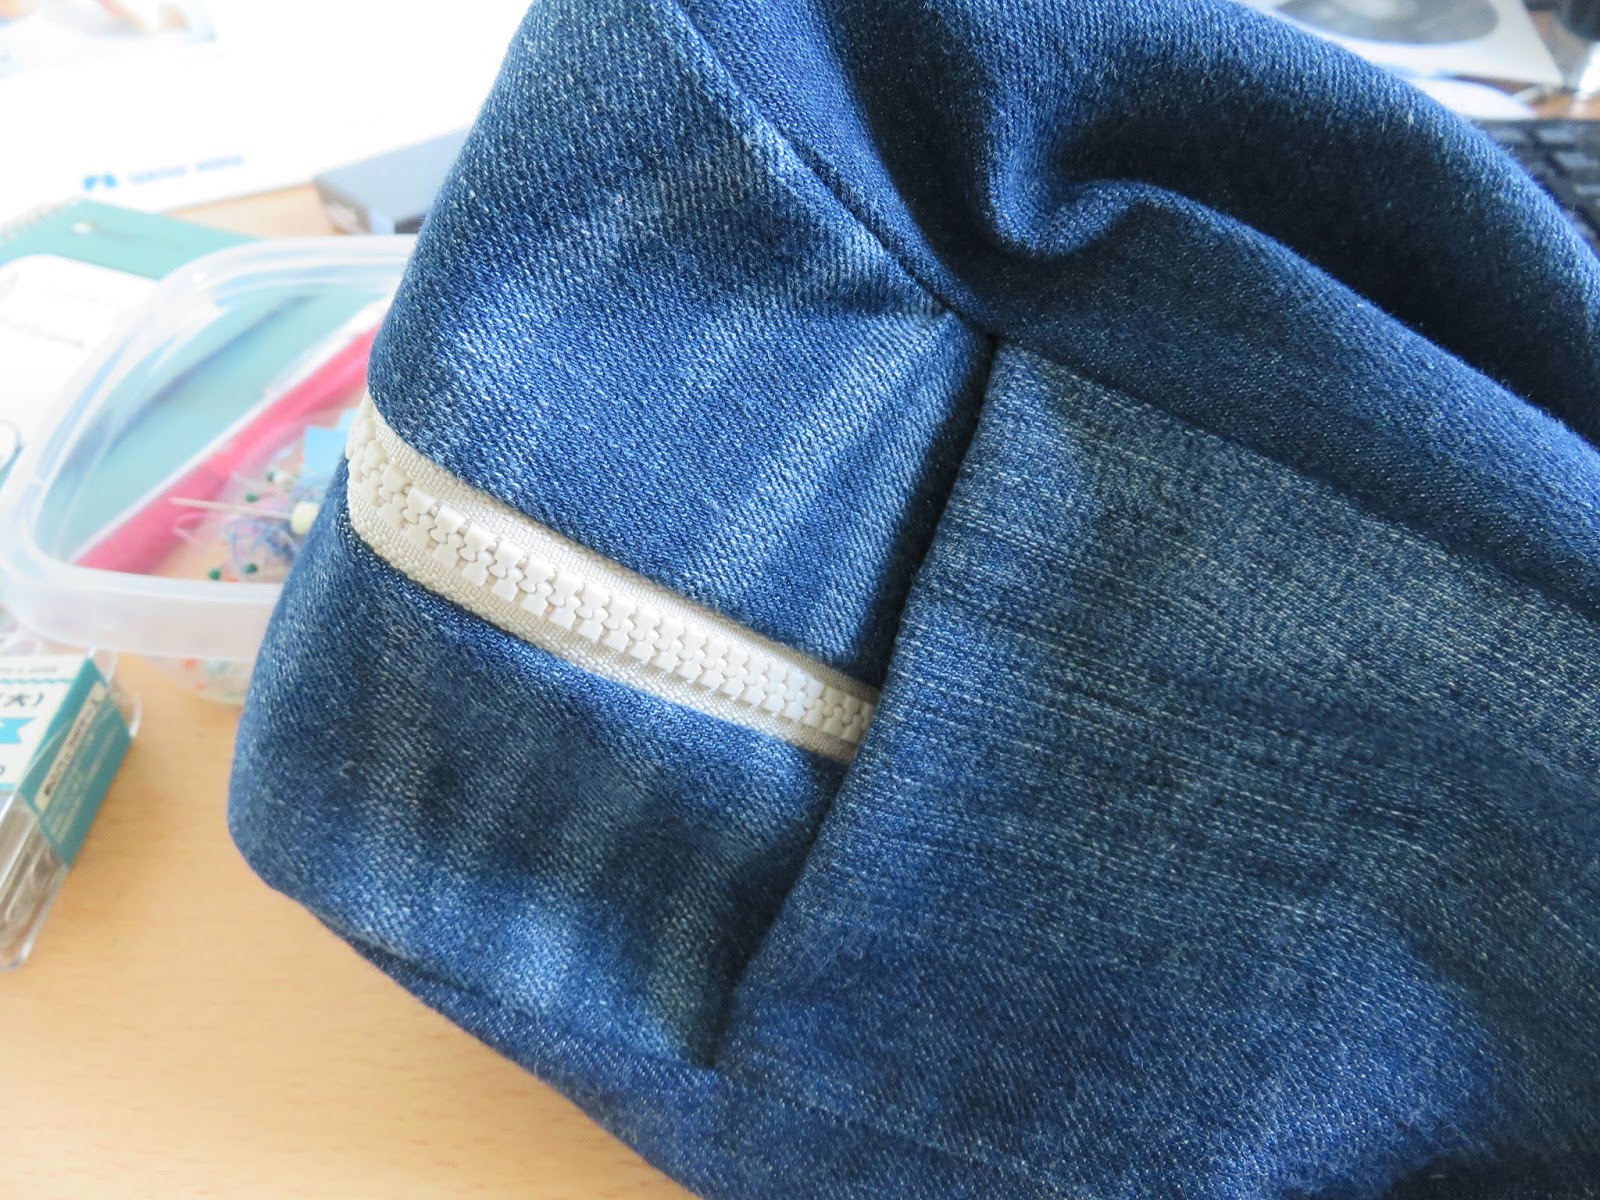
The finished zipper band (with zip) should be approx. 10 cm in width.

Step 5
Attach the zip. Mark the centre of the zip and place the mark on the centre seam. Place the zip face down on the zipper band, right sides together. Don't worry if the zip is longer than the zipper band, that's OK.

Use your zipper foot and sew in one side of the zip. The zip in the picture is upside down, right sides together.


Pin the other side of the zip to the zipper band on the other piece. Again, line up the centre mark on the zip with the centre seam. Sew.


Step 6

Attach the bottom piece.

Pin the bottom piece to the bottom side of the side piece right sides together, matching the centre seams. Sew as far as you can go before meeting the side/zipper band seam

Sew the other side in the same manner.
The bottom piece is also longer than necessary so you will have some extra fabric at the ends.

If you turn it out to the right side, it should look like this. Adjust if it looks a bit wonky. We'll make it look a bit nicer when we do the finishing.


So now we have our basic knitting machine bag done. It looks OK but lacks a certain something.


In part 2 of this tutorial, we add the finishing touches and make the optional velcro tab.

Friday, August 2, 2013

McCall's 6108 - Infants' Bibs and Diaper Covers

Baby Shower Gift


My friend at work is expecting a baby at the end of the year and I decided to make something as a baby shower gift.  I was planning to knit or crochet something but then I realised - she is having her baby in Australia where it will be mid-summer.  Obviously a wooly had wouldn't be very useful.

A little Googling led me to this pattern: McCall's 6108.

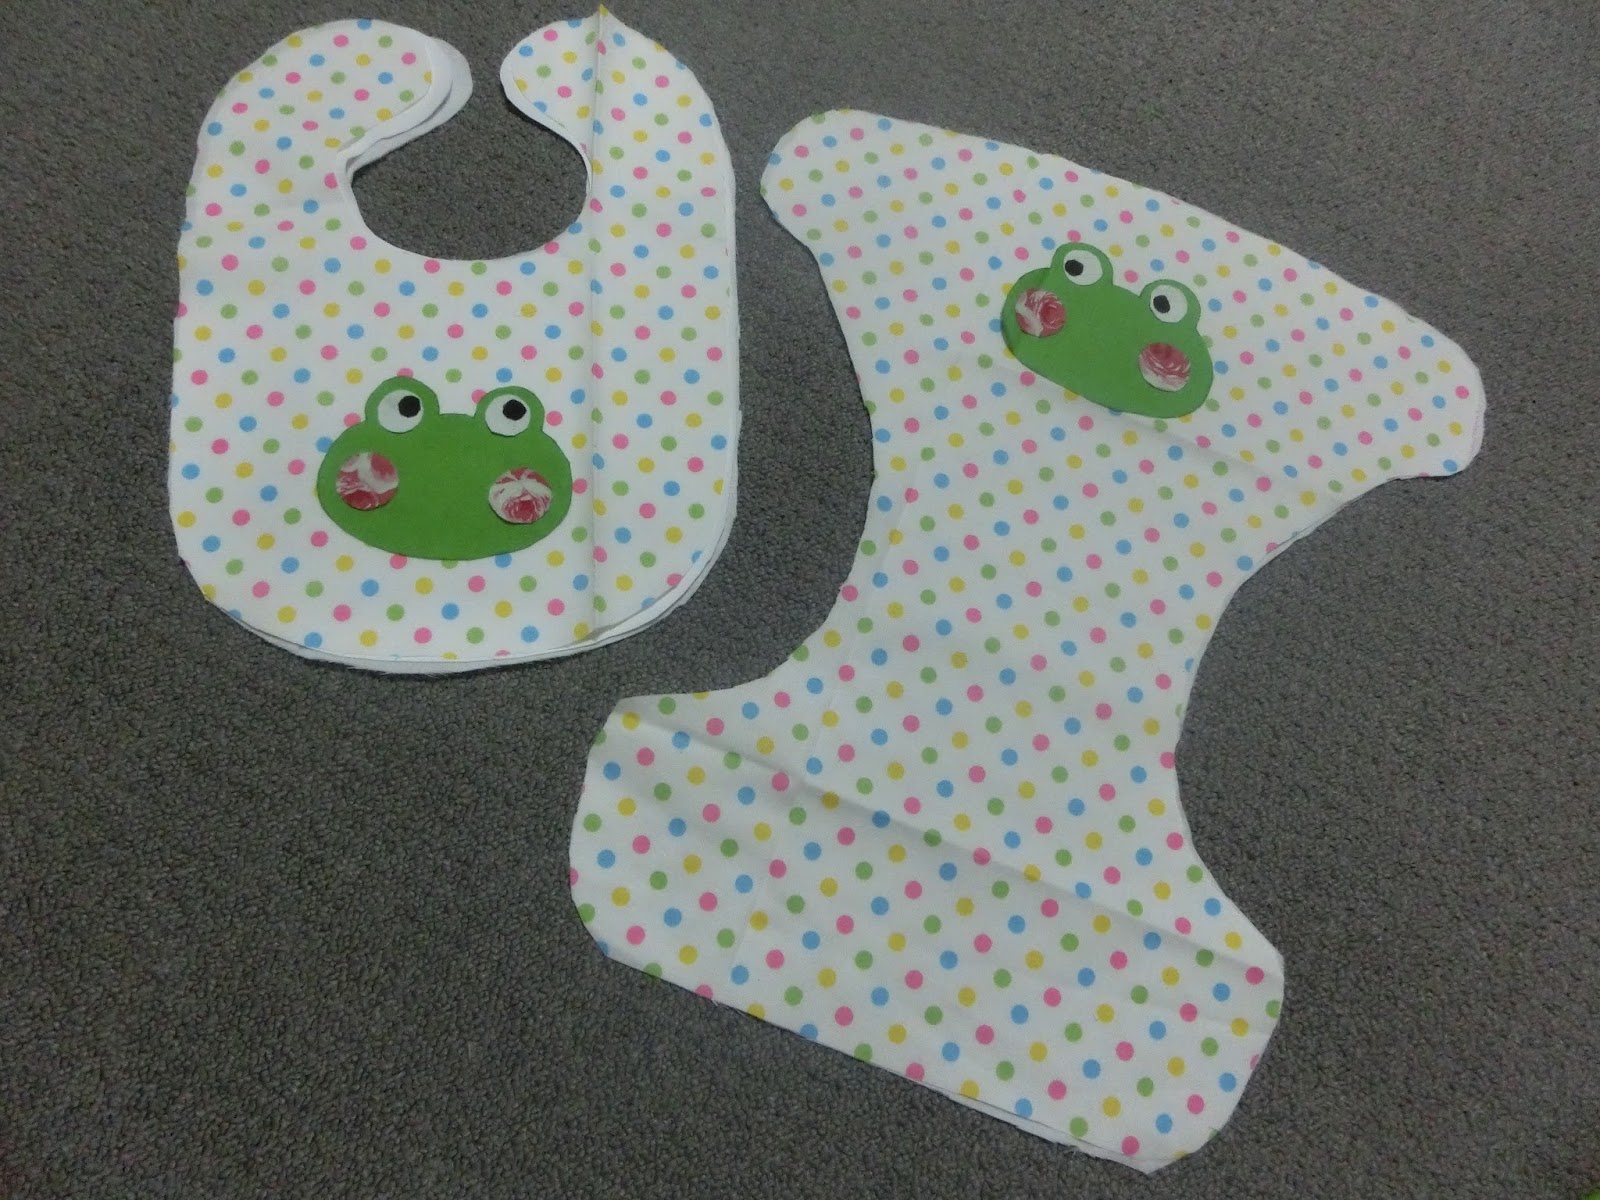
I am not sure whether baby will be a boy or a girl so I decided on the frog on the bottom right.  Now for the fabric selection:

I used four different types of fabric for this project - white polka dot cotton, green cotton shirting, white double gauze and PUL (waterproof fabric). 

First up, the applique.  I am new to applique so I improvised a bit.  For the small circles, I found some similar sized objects to trace around (a 500 yen coin and the lid from my marker pen).  I also fused interfacing to the back of everything.

Everything is cut out and ready to go!

Next, the froggies' faces.  I fused everything together with some double-sided interfacing and attempted to do a zig-zag satin stitch around the edges.  I failed miserably.  After unpicking the tangled mess, I instead opted for a blanket applique stitch to attach everything.  Hope the froggies survive the wash!


The mouths are sewn with three strands of embroidery floss using a back stitch.

The pattern requires batting for the inside of the bib.  I didn't have any on hand (and I'm sure it would take ages to dry) so I used some waterproof PUL fabric instead.

I am a glutton for punishment so I made my own bias binding this time.  You need lots and lots of it - well over 3 metres for the set!  The pattern calls for 1/4 inch double fold binding but that sounds way too narrow.  I think it should be closer to 1/2 inch.

It was a bit of a hassle getting the binding on.  I really need more practice (or a binding attachment!).  As a finishing touch, I sewed on some velcro and here it is!

The front of the bib and the back of the diaper cover.

 and the reverse sides.
I'd definitely like to make this one again as a gift - once I get a bit better at attaching bias binding, that is!

Friday, July 19, 2013

Simplicity 1590 - Retro Blouse - View A

Shantung Shirt

View B (with collar and bow) is here

Here is the other version of the retro blouse, this time in some white shantung polyester.  View A was much quicker to make than View B.  It doesn't have the fiddly collar or bow, making it a much simpler garment.

I was worried that the fabric wouldn't hold a crease properly but it all worked out and the darts turned out OK.


The next bit is exactly the same as View B - shoulder seams, side seams and peplum.
 
  The main difference between View B and View A is the scoop neckline and the facings.  Here are the facings all ready for sewing.

And here they are! 
 Next we need to hem the extremely long, curved peplum.  As the polyester was fairly slippery, I overlocked the bottom (stitch width around 6 mm) and then used the stitching as the first fold on my double hem.

 And this is how it turned out.


Simplicity 1590 - Retro Blouse - View B

Retro Blouse

I saw this pattern on sale a few weeks back and knew I had to have a copy.  I love the peplum and the fitted look of the waist.  Hopefully I will be able to do the pattern justice!

So here we have our pattern layout.  I just managed to get all of the pieces on to the 1.5 metres of fabric required by the pattern.  There were very few scraps left over.

The fabric I used is 100% cotton shirting with a rose/ribbon pattern.  Not my usual taste but I thought it would suit the retro style of the blouse.


This was my first time sewing darts and they turned out rather well.  In my enthusiasm, I sewed the front vertical darts as well.  They are supposed to be done later but it was probably a good thing that I sewed them first - I'll explain later on.

First up, the shoulder seams and then the side seams.  I overlocked the raw edges on each side before sewing the side seams.  Looking good so far...


Next, we attach the peplum.  The curve of the peplum gave me a bit of trouble but everything ended up where it was supposed to be...whew!  I needed to unpick about 2-3 cm from the bottom of the front dart that I accidentally sewed earlier.


Next, the waist ties.  I will now introduce my secret weapon for making ties - cooking chopsticks!
Chopsticks are great for turning things inside-out and pushing out corners - they are tapered enough to do the job and blunt enough not to rip a hole in your fabric.  These ties were really long and skinny so my supersized cooking chopsticks (approx. 30 cm long) did the job admirably.  They also cook a mean stir-fry.


So now for the tricky part.  The pattern says you need to do three things at once - sew the front dart, attach the ties and sew the side of the peplum to the front panel.  As I had already done the dart, I only needed to worry about two of these things.  I inserted the tie in the 'grotto' created by my pre-sewn dart and then pinned and sewed the seam , following the line of the dart down to the bottom.


Now for the collar.  This bit was confusing.  I have sewn a collar with facings before with the collar sandwiching the facing.  With this one, the collar is sandwiched between the facing and the blouse.
As you can see below (basted and ready to sew), the collar is peeking out from between the facing and the body of the blouse.


And there we have it - a very tasty looking collar sandwich!


Now comes the ironing bit.  *sigh*  The peplum needs an enormous, curved double fold hem.  Thank goodness for my ironing guide.  I would have gone potty without it.


Next we add the finishing touches - buttonholes, buttons and the ribbon at the neck.  Ladies and gentlemen, I give you the finished product!


I also made View A (scoop neck) with some polyester shantung.  You can find the photos here: Simplicity 1590 - Retro Blouse - View A.